ELLE SERA BELLE by Ema: DIY

Pages

  • Home
  • About
  • Outfits
  • Recipes
  • Life
  • Tutorials
  • Contact
  • SHOP

Tuesday Mama and Baby Matching DIY Pom-Pom Beach Shorts


Hi lovely friends,

Ok, so I know summer is almost over, but I was so proud of myself when I made these matching pom-pom shorts not to share them. I was inspired when I saw one of my favorite bloggers, Merrick wear them. She is an amazing seamstress and designer and I look up to her and how talented she is. I love every single post she makes. You should all go check her out, cos she makes great DIY and sewing tutorials. I followed Merrick's Art Tutorial for my shorts and then used a pair of Aria's shorts to trace the pattern for her shorts. Added some elastic band and some pom-poms and they were done in no time. It was easy peasy. We wore these matching shorts during our trip to San Diego over a month ago and I loved how cute Aria looked in them. 
They probably don't fit her anymore so I am glad I could take these picture then. 

Thanks for stopping by and let me know if you liked them and want to see some more sewing tutorials in the future.
XO

Ema

Thursday How to repurpose a Pringles Can + 5 creative ways to use it


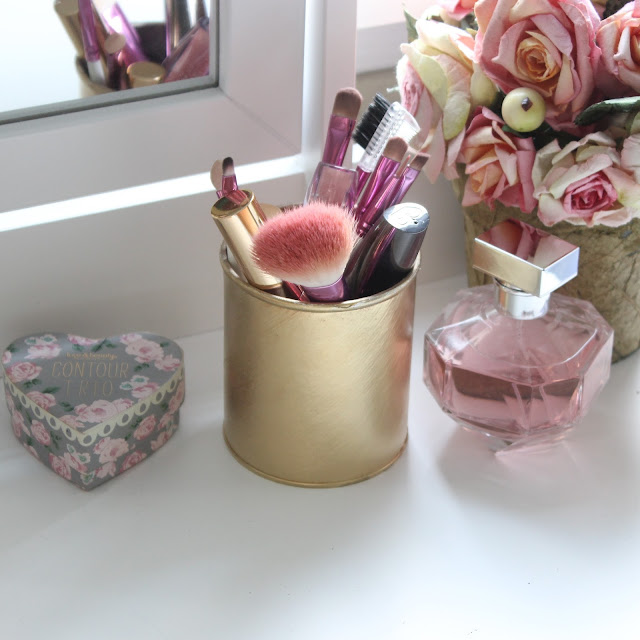
So we recently bought a bunch of mini size Pringles from Costco to have as quick snacks around the house or when we go to parks, and every time I finished one I kept thinking of how I could re-purpose the cans and use them for something else. It literally took me 5 minutes to turn it from a red Pringles Can to a cute Gold Can which can be used in so many ways. I am a true believer that a little spray paint can re-purpose anything. And of course I chose gold, cos I love everything gold, but you can use your own favorite color or the one that matches your home decor.


So some creative ways to use it: 
1)Hold all your make up brushes 
2) Bright up a corner with a gold flower vase
3) Collect all your hair ties/clips in one place
4) Hang your most recently used jewelry before you place them in your jewelry box.
5) Glam up your office space with a gold pen holder 

How to repurpose a Pringles Can + 5 creative ways to use itHow to repurpose a Pringles Can + 5 creative ways to use itHow to repurpose a Pringles Can + 5 creative ways to use itHow to repurpose a Pringles Can + 5 creative ways to use itHow to repurpose a Pringles Can + 5 creative ways to use it

So which one is your favorite! 
Comment below! 

post signature


DIY Fall Decor Idea - Easy Fall Wreath Tutorial

Fall Wreaths can be such a fun way to decorate your home during this season. I usually end up buying one, but this year I decided to make it myself; and I had so much fun making it. So today I am bringing another easy tutorial on how to make a Fall Wreath. 


Materials you'll need:
Two different kind of Yarns
A bunch of Silk Flowers 
Scissors
Glue Gun

Step 1: Start by wrapping the yarn of your choice around the foam ring. Make sure that the yarn is covering everything so the white foam ring is invisible. This can take a while so, put on some music or your favorite TV show and you will have more fun making it.
Step 2: After you are all done with covering the foam ring, it's time to unleash your creativity. With this type of DIY projects, it's all about how creative you can get. Cut your favorite flowers and start gluing them into the wreath, making your own design. I chose purple and golden colors since they go well with my home decor, but you can choose your own favorites colors or even go for more traditional FALL colors such as yellow, orange etc.
After you have completed this step you are done with this little project and you can tell all your friends and family how creative and crafty you are! I sure did!
post signature


Tuesday DIY Fall Decor Idea: Changing Colors


DIY FALL DECOR

I was taking an afternoon walk the other day and my feet kept playing with the colorful leaves on the ground. At that moment, I thought how great it would be if I used some of them to make a DIY Fall Decor. So I picked a few green, orange and red leaves and ideas kept flowing.


Materials needed:
Colorful Leaves
Liquid glue
A sheet of paper
A Frame
This is a fun little project that doesn't require much skills or effort, so it can be a great activity to do with your kids. I am sure they will love it. I felt like a little kid in elementary school when I carefully glued those little leaves on the white sheet of paper. I used a heavy book to make the leaves stick faster. I am sure you can come up with other pretty designs as you make your own.

So go pick up some leaves and bring the beauty of Fall into your home!


PS: And if you've ever wondered why do leaves change colors in the FALL here is a fun, short clip explaining why.


post signature


Friday Friday Favorites - DIY Edition


It's Friday again! Finally!

I hope you all had a great week and have great plans for this long weekend. This Saturday I am hosting a Baby Shower for one of my friends and I am so looking forward to that. Stay tuned for great Baby Shower decorations, food, and free printable ideas.

Today I decided to bring you some easy DIY projects {Thanks Pinterest} that I am loving lately. I have only tried to make the Necklace scarf so far and it was so easy and turned out great.
I will definitely be making the Rose Heart frame! Such a great idea to preserve memories!

I hope you like these fun little DIY projects. Let me know which one is your favorite.


post signature
Related Posts Plugin for WordPress, Blogger...